-
Servo drive
-
The purpose of the lecture: To study the structure of the servo drive, the library, as well as its control.
The content of the lecture:
1.1. Switch…case
1.2. Servo drive. Servo control.
1.3. The Servo Library.
Didactic units: do...while cycle, Servo, Servo library, pulse duration.
5.1. Switch…case
The switch...case construct is a convenient replacement for a long if...else construct that compares a variable with multiple values.
Запомнить!
switch (выражение) { case значение1:
действие 1; break;
case значение2: действие 2;
break;
...
default:
действие, если ни один вариант не подошел break;
}
Let's give an example of a related switch...case. We output four different messages
"Hello, ATT", "Hello, TMO", "Hello, TTT" and "I don't know it" depending on the digit input into the serial interface monitor (Listing 5.1).
Листинг 5.1. Switch…case
void setup(){ Serial.begin(9600);
}
void loop()
{
if(Serial.available())
{int var = Serial.parseInt(); switch(var)
{ case 1: Serial.println("Hello, ATT"); break;
case 2: Serial.println("Hello, TMO"); break;
case 3: Serial.println("Hello, TTT"); break;
default:
Serial.println("I don't know it"); break;}
}
}
This program works as follows. Inside the void loop function()the var variable is declared. If we enter integers from the keyboard into the buffer where the Serial.available() data will be stored, then these numbers will be output using Serial.parseInt() with the assignment of the var variable. If we select the value 1, the message "Hello, ATT" will be displayed. If 2 or 3, then respectively "Hello, TMO"
or "Hello, TTT". If no value other than 1, 2 or 3 is selected, the message "I don't know it" will be displayed.
5.2. Servo drive. Servo control
A servo is a motor whose shaft position we can control. It differs from a conventional motor in that
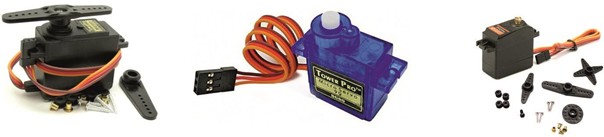
Figure 5.1. General view of the servo
it can be precisely set in degrees to the position in which the shaft will stand. Servos are used to design various mechanical movements of robots (Fig.5.1).
In order for the servo to turn to a certain angle, it needs to be signaled. This signal is characterized by a pulse length expressed in microseconds (microseconds). Which position of the rotation angle the servo should take depends on the pulse length. If the pulse duration reaches 1520 microseconds, then it corresponds to the rotation of the servo at an angle of 90 °. At 2400 microseconds, the servo rotates 180°. If it is a short pulse, for example 544 microseconds, then the position of the servo will rotate by 0°. In the Servo library for Arduino of all types, the following pulse lengths are set by default: 544 microseconds for 0° and 2400 microseconds for 180°.
The Servo Library
The Servo library allows software control of servos. To do this, a variable of the Servo type is connected. The control is carried out by the following functions:
attach() – attaches a variable to a specific contact. There are two possible syntax options for this function: servo.attach(pin) and servo.attach(pin, min, max). In this case, the pin number of the contact to which the servo is connected, min and max are the pulse lengths in microseconds responsible for the rotation angles of 0 ° and 180°, i.e. 0° corresponds to 544 µs, and 180 ° corresponds to 2400 µs.
write() – instructs the servo to rotate by a certain angle value. The syntax is as follows: servo.write(angle), where angle is the angle to which the servo should turn.
read() – reads the current value of the angle at which the servo is located. The syntax is as follows: servo.read(), returns an integer value from 0 to 180.
attached() – checks whether a variable has been attached to a specific pin. The syntax is as follows: servo.attached(), returns a logical truth if the variable was attached to any pin, or false in the opposite case.
detach() – performs the reverse action of attach(), that is, detaches the variable from the pin to which it was assigned. The syntax is as follows: servo.detach().
Here is an example with the code decryption provided in Listing 5.2.
Листинг 5.2. Сервопривод
#include <Servo.h>
Servo myservo; // переменная myservo void setup(){
myservo.attach(8);
}
void loop(){
myservo.write(90); // поворачиваем на 90 град. delay(200);
myservo.write(0); // поворачиваем на 0 град. delay(200);
myservo.write(180); // поворачиваем на 180 град. delay(200);
}
At the beginning, the <Servo.h> library is connected. The myservo variable is declared with the Servo data type. In the void setup function() set the port to number 8. In the void loop() function, perform the actions of the servo. We set consecutive rotation angles by 90°, 0° and 180° using the myservo.write() command.
-